Introduction:
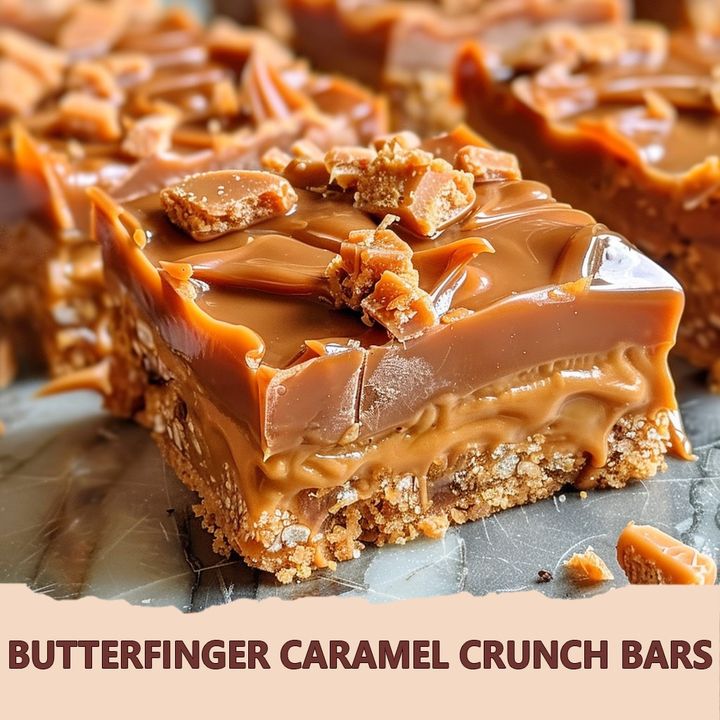
If you’re looking for a sweet treat that combines the crunchy, buttery goodness of Butterfinger with gooey caramel and a touch of chocolate, this Butterfinger Caramel Crunch Bars recipe is exactly what you need. With a simple crust, rich caramel filling, and an irresistible Butterfinger topping, these bars are perfect for any occasion. Follow the steps below to create this indulgent dessert right at home!
Ingredients:
For the Crust:
- 1 cup all-purpose flour 🌾
- ¼ cup granulated sugar 🧂
- ½ cup butter, softened 🧈
For the Caramel Filling:
- 10 oz caramel candies 🍬
- 3 tablespoons heavy cream 🥛
For the Topping:
- 1 ½ cups chopped Butterfinger bars 🍫
- 1 cup milk chocolate chips 🍫
- 3 tablespoons peanut butter 🥜
Instructions:
1️⃣ Preheat the Oven:
- Preheat your oven to 350°F (175°C). Line an 8×8 inch baking pan with parchment paper, leaving extra on the sides to easily lift the bars out later. 🔥
2️⃣ Prepare the Crust:
- In a mixing bowl, combine the flour, sugar, and softened butter. Mix until the mixture becomes crumbly. Press this mixture evenly into the bottom of the prepared baking pan. 🥄
3️⃣ Bake the Crust:
- Place the pan in the oven and bake for 15 minutes or until lightly golden. Remove from the oven and set aside to cool slightly. ⏳
4️⃣ Make the Caramel Filling:
- In a microwave-safe bowl, combine the caramel candies and heavy cream. Microwave in 30-second intervals, stirring after each interval until the caramel is fully melted and smooth. Pour the caramel over the baked crust. 🍮
5️⃣ Add the Butterfinger Topping:
- Sprinkle the chopped Butterfinger bars evenly over the warm caramel layer. 🍫
6️⃣ Prepare the Chocolate Topping:
- In a microwave-safe bowl, combine the milk chocolate chips and peanut butter. Microwave in 30-second intervals, stirring between each, until smooth. Pour this mixture over the Butterfinger layer, spreading it out evenly. 🍫🥜
7️⃣ Chill the Bars:
- Place the pan in the refrigerator and chill for at least 2 hours or until the bars are set. ❄️
8️⃣ Slice and Serve:
- Once chilled, remove the bars from the pan using the parchment paper, slice into squares, and enjoy! 🍫🥜
Notes:
- Make-Ahead: You can prepare these bars a day in advance and store them in the refrigerator until you’re ready to serve.
- Storage: Store the bars in an airtight container in the fridge for up to one week.
- Customization: Feel free to substitute Butterfinger with other favorite candy bars, like Snickers or Reese’s for a fun twist!
- Cutting Tip: To get clean slices, dip a knife in hot water, wipe it off, and cut through the bars. Repeat for each cut.
FAQs:
Q: Can I use homemade caramel instead of store-bought caramel candies?
A: Absolutely! If you have a great homemade caramel recipe, it will work just as well. Just make sure it’s thick enough to hold up in the bars.
Q: Can I freeze these bars?
A: Yes! Once they are fully set, you can wrap them in plastic wrap and store them in the freezer for up to 2 months. Thaw them in the fridge before serving.
Q: Can I use a different type of chocolate?
A: Milk chocolate works great, but feel free to use dark chocolate or white chocolate for a different flavor profile.
Conclusion:
Butterfinger Caramel Crunch Bars are the ultimate indulgence for anyone with a sweet tooth. Whether you’re serving them at a party or just craving a decadent dessert, these bars are easy to make and packed with flavor. The buttery crust, smooth caramel, crunchy Butterfinger pieces, and rich chocolate-peanut butter topping create a perfect combination of textures and tastes. Try them today, and watch how quickly they disappear!
Enjoy baking, and don’t forget to share this recipe with your friends and family!

